What's new

hardyhell

Enthusiast
Joined
Feb 2, 2016
Messages
457
Reaction score
86
Location
Odelzhausen
Hy.
I try to calibrate my NAC cabs as bright and good as possible. But I have not found a good method to do so. Or better said the ones I found do use quite different approaches.
I know these so far:

http://mikejmoffitt.com/pages/ms9-hax/


https://wiki.arcadeotaku.com/w/How_to_Correctly_Set_Up_Monitor_Colours_and_Brightness


http://www.emphatic.se/?p=710

So I want to ask here.Any professionals who have a good way to do it?
General question also is if it’s best to have the cutoff as low as possible and screen high? Where to start calibrate. Gain middle ? Brightness low ? Contrast ...

Thanks
 
The Emphatic guide is great for getting to a good place when the only tools you have are a test pattern and your eyeballs.

The “professional” approach is to use a colorimeter and use it to precisely adjust the white point balance for a 6500K color temperature and a 2.2 gamma level.

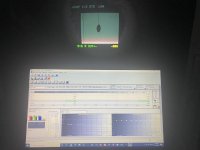
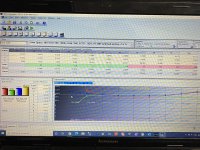
It’s only worth doing the in-depth calibration if your tube is in good shape and your chassis has been recapped though-otherwise the tube will drift out-of-spec for very light scenes. If you look at the photo of my recent calibration results on my MS9 cab below, you can see how the old caps cause it to drift as the brightness increases, although it still looks really good to the naked eye. I still need to recap the chassis on that thing...

If you’re interested in going all-in, pick up a USB colorimeter (used is fine), use the Emphatic guide to get your CRT to a good starting point, and then follow the procedure I’ll link below. I use a MiSTer running the SNES 240p Test Suite connected to the cab through a JPAC as the signal generator for the calibration patterns. It takes me approximately 2 hours per display to fully calibrate it.

http://www.curtpalme.com/forum/viewtopic.php?t=10457

Ignore the references to a newer guide-that’s for modern flat-panels.

270F2E0F-E777-48EC-8C36-BA43C6FEC1C3.jpeg2A2F4A01-5809-43EF-8B27-DE47FB050E0A.jpeg50F07D11-75E4-4B7D-AC5F-6138C425CAE7.jpeg
 
Last edited:
Colorimeters are way OTT for old arcade monitors. These don't have professional grade tubes inside them.

General question also is if it’s best to have the cutoff as low as possible and screen high?

This will depend on the monitor. For a MS9, yes, you will want to have the cutoffs low. I usually turn them to point west, everything else at middle position. Then turn the screen pot on the flyback before I get a decent looking picture (blacks will have to be black), then work from there. Remember to adjust focus after all is said and done.

Different tubes will give different results. They are a quarter century old at this point. Some can have a dull pic. No amount of tuning will help with that. A last resort is rejuvenating the guns and hoping for lasting results.
 
Hy.
Yea the emphatic has a total different approach as the other one on top of my list.
“04. On the remote inside the coin door, turn all of your RGB GAIN/DRIVE pots all the way down, and put the BRIGHTNESS pot in the midnight/neutral position“

so he uses 0 gain and mid brightness.

“05. On the chassis under the front of the tube, turn down the RGB CUT OFF pots to a neutral postion (50/50)”

and 50% of cutoff. While the other one uses cutoff almost 0 and gain50 bright slightly above 50.
Don’t get the point of each of the guys why they do so. What’s their theory. Or better said which one gives me the brightest screen. Without of course washing the blacks out. Do you recommend removing the coating ?
I think the white will glow more without the coating. Which can be distracting.
I would do another calibration with the capcom test screen Cps2. Would this one be good?
 
Colorimeters are way OTT for old arcade monitors. These don't have professional grade tubes inside them.

I respectfully disagree. The grade of tube doesn’t have much to do with using a colorimeter; rather, the colorimeter is for measuring a tube‘s output accurately rather than just “eyeballing” it. Naturally every person varies in both how nice they want their CRTs to look and how much they trust their eyes as an accurate measurement device. The Emphatic procedure is great for dialing in a great looking picture with just your eyeballs in 30 minutes or less If you’re not too picky about things.

For the OCD freaks like me that want the maximum quality a display can deliver, the colorimeter is worth the money (used ones aren’t expensive) and the extra time invested in dialing everything just right can be satisfying and well worth it. I’ve been able to calibrate free off-the-curb consumer sets to look identical as $1000+ PVMs other than some minor geometry distortion in the corners. Often extra calibration both at time of sale and afterward was the only thing separating many consumer sets from a professional set back when they were new. Many arcade cabs calibrate very nicely too (PVM display quality is regularly achievable) as long as the chassis offers all the necessary adjustments and has been refreshed.

I do agree 100% with you though if the cab has a Zenith tube. Zenith cab tubes are Grade A garbage.

Anyway, OP asked what the “professional“ approach was, and I do enjoy putting my lecture hat on. :D
 
Think of it this way:
Cut-off is for adjusting the black point - the range of color between total black and 30% of total.
Drive is for adjusting the white point - the range of color between 70% and 100% of total white.

Your mid-range of 30%-70% is determined by how the cutoffs and drive balance against each other. Cutoffs take care of shading and details while drive displays the bright objects.

Contrast adjusts the balance between the black point and white point. You should leave it set at center and adjust everything else around it.

Brightness raises or lowers the RGB channels equally. You’ll want it set to whatever level best suits your eyes and the game you’re playing. Dark rooms need less light and less Brightness. Some boards are brighter than others.

The Emphatic procedure sets your cutoffs and black level first, then brings the drive up to balance against them.

I don’t recommend removing the anti-glare coating on the monitor unless it’s scratched. It shouldn’t be necessary to remove it to get a good picture if the tube and chassis are healthy.

The CPS2 test screens are good for the grid pattern and color bars but they don’t have solid color tests if I recall correctly.
 
Last edited:
I think grade of tube absolutely plays in to it. Age and use play a huge part too.

I have multiple linked cabs, like pairs of sitdown driving games. No amount of fine tuning will have the monitors looking exactly the same. They all have subtle tints to them.

and 50% of cutoff.

For a MS9? Nope, not correct. Try it. See if you agree with me.

As for what step you do first, I'm not sure it really matters. The end result should be more or less the same. The steps I wrote before work for me.
 
For a MS9, yes, you will want to have the cutoffs low. I usually turn them to point west, everything else at middle position. Then turn the screen pot on the flyback before I get a decent looking picture (blacks will have to be black), then work from there. Remember to adjust focus after all is said and done.
You mean the cutoff pots are let’s say horizontal pointing with the longer markers of the cross on it.
Then you bring up a Color bars test picture and go up or down With screen until The blacks are not grey. And the last colour bar under number 0 column (cps2 Test) Is not visible but number 1 barely
 
I just read @Hatsune Mike's calibration guide. I skip the contrast part, but honestly, his way sounds even better. Just follow that:

http://mikejmoffitt.com/pages/ms9-hax/#calibration

It has pictures and eloquently written instructions. If you have a MS9, this is the guide to follow.

CPS2 color bar screen is fine for this. 0 dark, 1 barely visible sounds good to my ears.
 
so this is what i did now all 3 cutoff and the sub contrast horizontal position. all gains and brightness horizontal. focus with the notch pointing at 12 position the position where it clicks in.

brought up the grid first and went down with screen on the flyback until the black looked black from what i could see with one hand behind the cab.

then put the colour test grid up and went a bit more down with screen because the black there was still too grey.

hard to see all that good when having one hand inside the cab. so now it was almost perfect black. the last traces of grey i removed with slightly going down on brightness. only a tiny bit. then all blacks in this screen looked black for me. did even check if there i some room to go higher with the cutoffs but the seemed to be fine as the were because the were just at the point where they did not colour tone the black yet.

so i left into the game street fighter 2 alpha. noticed that the q sound and the capcom screen was too intense. meaning when appearing at full pover is was washed out lets say. so i lowered the contrast a tiny bit. looked fine to me then.

so yea still dont know what is the real benefit one one or the other way ( screen low with cutoff higher vs screen high with cutoff low) also dont know where the sub contrast kicks in.

And one side question... i just put in the m92 mystic riders after the cps 2. why is the irem stuff always looking kind of not sharp,too dark and odd coloured compared to the cps2.
 
IREM M72, M92 games are always darker, you just have to bump up the brightness. PGM Cave games are a little washed out. You need to adjust to compensate. Toaplan shmups need you to adjust picture position, etc.

Always expect to make adjustments between boards / games.
 
also have the impression that my M92 and M72 are slightly blurrier than other games, but i certainly don't see me dialing in the focus every time i change games - i also haven't tried if that has any effect at all.

my goto pcbs for my monitors normally are, CPS2, Espgaluda2 PGM repro and RFJ...
 
Everytime I change out a PCB on the cabs, I make minor adjustments to the colour. Adjust the screen width and height after measuring the 5v. Then set the volume to match the other cabs. It’s a ritual/habit I got, it’s takes a small amount of time but it’s well worth it.

I wouldn’t go adjust anything outside of what’s on the remote board though. You generally just do that once.
 
kontrast you mean? because brightness will wash out black
Contrast or Brightness. It depends on the game really. Sometimes you need a bump in both to look right even if the black is sightly washed out/grey.

Get it looking right for your eyes and just play. There’s a lot of times with these old cabs they will never look “perfect”. You just gotta suck it up and live with it most of the time.

In hindsight, a bulk of the cabs I played on growing up at the arcade/corner stores were absolutely atrocious and washed out.
 
If you want to know the difference between the cutoff and "brightness" balance etc you need to understand what they are actually doing. There is no magic position as tubes and chassis are all different. Saying 50% position or move here/there is meaningless. You need to have a good grasp of what the control grid is and what the screen grid is in a CRT. I suggest starting at page 48 of sencore cr7000 manual. This will be good base knowledge for what you are adjusting and why.
 
IREM M72, M92 games are always darker, you just have to bump up the brightness. PGM Cave games are a little washed out. You need to adjust to compensate. Toaplan shmups need you to adjust picture position, etc.

Always expect to make adjustments between boards / games.
I’ll add Atomiswave to this as my monitor is always way too bright. When I first hook up an Atomiswave mobo
 
Back
Top