What's new

Chandy Cab Restoration

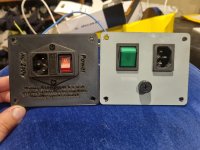
It ends up looking like this...
The big power cap goes from a cheap chinese 470uf 200v to a 560uf 250v Nishicon long life.
Looking at the rectifier diodes I am not interested in playing the game of what blows first, your 2A fuse or your 2A diodes. Out they come, holes ever so slightly drilled out, if you are careful you shouldn't have to scratch back too much mask to get a good solder.
The 140ohm white wire wound is a key point of failure in these chassis (along with almost every cap). These have been specked at 140ohm 25W to assist in heat dissipation of the transistor mounted on the back wall. If we cool this transistor a little better we can get this specked right 180ohm 25W, an ali clad mounted to the back wall does nicely.
While we are here we will replace the cap after the transistor with another Nishicon long life taking it from 100uf @ 160v to 150uf @ 250v
The trimpot in this area adjusts the DC Voltage which should read 110v over the 2w grey resistor to the bottom left (which the ali wall up) of the old white 140ohm wire wound. If you are using a 240v to 120v step down transformer to power this thing you likely have 117v comming in adjust it back to read 110v DC over the resistor.
This thing should be a little more reliable now. Still a few more things to change out (all the caps) but that can wait a bit.
 

Attachments

  • 20250418_101624.jpg
    20250418_101624.jpg
    142.8 KB · Views: 29
  • 20250419_200032.jpg
    20250419_200032.jpg
    169.5 KB · Views: 27
  • 20250419_200041.jpg
    20250419_200041.jpg
    168.2 KB · Views: 29
Last edited:
Nice work. I dunno how you know what to do here but I’m impressed and it’s going to help other people I’m sure. Are these chassis fairly versatile in their application?
 
Nice work. I dunno how you know what to do here but I’m impressed and it’s going to help other people I’m sure. Are these chassis fairly versatile in their application?
There seems to be 2 on the market. One 25-27" and 1 29". They are fairly versatile but some of that flexibility can only be achieved by component changes. Pretty easy to work on and a pretty straightforward circuit for someone who comes from building tube amps.
 
3.1 STICK IT 2 EM

Only one type if stick to put in a shmups cab. Sanwa LX with the original spring changed out for a 2lbs and a 1mm oversized stainless steel actuator.

Similar with the buttons Seimitsu screw ins as they are more robust and not as touchy. Nothing worse than dropping an unintentional bomb.

The marquee buttons are the same Seimitsu but the 24mm start buttons are just cheap chinese copies for now.
 

Attachments

  • 20250423_172332.jpg
    20250423_172332.jpg
    137.6 KB · Views: 17
  • 20250423_172409.jpg
    20250423_172409.jpg
    133.3 KB · Views: 17
X.XX ON THE DOWN LOW
Cab is in for paint this weekend. Despite the fact we are good mates, I can't tell you anything about the guy painting it, except for he is Italian, has a business just across the road from work, and his business seems to be closed lots. You work it out. He is also one of the best painters I have ever seen. I dropped off a can of plastic primer and a can of base coat white but he tells me he has something special in mind. Can't wait to see the results.
 
3.1 STICK IT 2 EM

Only one type if stick to put in a shmups cab. Sanwa LX with the original spring changed out for a 2lbs and a 1mm oversized stainless steel actuator.

Similar with the buttons Seimitsu screw ins as they are more robust and not as touchy. Nothing worse than dropping an unintentional bomb.

The marquee buttons are the same Seimitsu but the 24mm start buttons are just cheap chinese copies for now.
Nice option. I haven’t seen those actuators before. Do they feel different to play - being metal I mean - not the oversize?
 
Yeah, I think it makes the throw feel more solid or harder to knock and the return quicker, but this could all be in my head, who knows, a lot of these things are really subtle but definitely do contribute to an overall feel.
 
3.2 JUST LIKE US CHINA RELATIONS AT THE MOMENT "MY WIRE IS THICKER THAN YOURS"

There are a few issues on the power supply of the chandy. Most need to be totally rewired if you don't want your MF roof on fire. This one had a roughly wired meanwell supplying 5v @1A with no 12v and no -5v. That won't work.
Not wanting to spend too much on this MF, I am using a Meanwell RT-125b that was free because I ordered an A and they sent the wrong one from China. They corrected their mistake and sent the A which I used on another project but let me keep the B. The only problem with the B is that it supplies +5v, +12v and -12v not -5v.
I also have a CHAMMA harness straight from China and these also have issues one of which is that they are not wired for -5v. So I am taking the originality angle and not wiring for -5v (for the time being). The other issue with the Chinese CHAMMA harness is the stupidly thin power wires masquerading as 18awg (see photo for comparison with a proper 16awg). While from the outside they look like 18awg, just like Trump, they are all plastic and lack any substance. To make these work we will add a voltmeter, a strain reliever, do some organising and add thicker wires (make sure you do the GND too, if dont there is little point but i dont have photos of that).
.
 

Attachments

  • 20250425_112230.jpg
    20250425_112230.jpg
    146.5 KB · Views: 14
  • 20250425_102224.jpg
    20250425_102224.jpg
    189.8 KB · Views: 14
  • 20250425_110033.jpg
    20250425_110033.jpg
    86.7 KB · Views: 14
3.3 GETTING POWERED

Not much to see here just replaced the old IEC with a 10A all in one including EMI filter. Also added a warning to make sure I cover myself for liability. The problem with the old one was not so much the front but what was behind it.
 

Attachments

  • 20250425_224327.jpg
    20250425_224327.jpg
    201.8 KB · Views: 13
  • 20250425_224449.jpg
    20250425_224449.jpg
    170.3 KB · Views: 13
  • 20250425_224511.jpg
    20250425_224511.jpg
    240.9 KB · Views: 13
Back
Top