What's new

How many would you preorder/buy?

  • 1

    Votes: 32 24.1%
  • 2

    Votes: 84 63.2%
  • 3

    Votes: 5 3.8%
  • 4

    Votes: 11 8.3%
  • 5+

    Votes: 1 0.8%

  • Total voters
    133
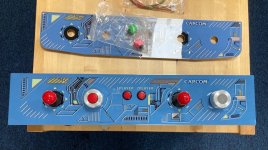
I am heading the the Galloping Ghost next week and plan to play a bit on the forgotton worlds official cabinet with real capcom spinner. I do remember last time I was up there being so impressed with how the game plays with that spinner. I am so glad I backed this project and hope to put it through it's paces once I get it all set up. I got my panel yesterday.
GG is a sick arcade....I would love to get back and visit it again, and then go snag some portillos....... :(
 
Alright just to correct some misinformation in here, you can use these spinners as regular ones for games like Arkanoid , Arkanoid Revenge of Doh, Arkanoid Returns. Others that also use the same setup for spinners.

The pinout is the same as classic taito spinners.

I was able to get it working with Arkanoid Returns on the Taito F3 by connecting the optic boards to my custom Taito Spinner Sega harness which routes X1 and X2 through Jamma inputs left and right.
5v and ground is connected to the Jamma edge as well. No Brizzo board required.

Here’s my custom Taito Spinner Sega harness (connected to my original Taito spinner):
58BE4389-09AD-495B-B63F-6791854E05DE.jpeg


Taito spinners use 4-pin molex connectors. The FW spinners have JST connections, so I built a small adapter to retain my custom Sega harness’ ability to still connect to a Taito spinner if need be.
8843EDEC-A5A8-4D15-ABB9-3057C2A08971.jpeg

For Arkanoid Returns and Puchi Carat on the Taito F3, go into the service menu —> configuration —> Device to “Sensor”.
23E89C4F-0CD2-4EE6-8FBF-3CE3DCB6F255.jpeg

Also make sure you set the physical jumper on the F3 motherboard from joystick to Sensor as well. (It’s close to the Jamma edge. Or if you use @everten ’s stereo/kick addon board there’s a switch that makes it easier to change from joystick to sensor).

That’s it. It works great and the weight of the FW spinner feels right for these games.
 
FYI, I got the repro Capcom stickers being printed right now and should be available to order during the first week of October.

27C8BE49-7732-44BD-B78A-D13C319E2F0C.png


There will be 2 options, regular and holographic print. I will put up a FS post when they’re ready.
 
Once again, thank you to @hursit for this excellent reproduction. There is no need at all to modify, but I decided to have a bit of tinker and see what could be done to put them in other setup configurations seeing as the Capcom mounting plate is different to a lot of other setups.

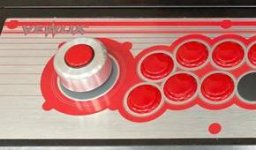
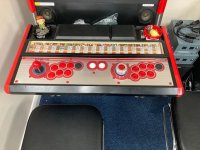
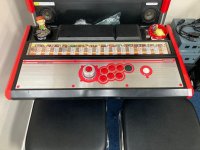
Having measured and remeasured, I decided that an Original Taito Vewlix C 1P Panel was my best starting point, as it only required one hole to be drilled. (I used plenty of sticky tape under and around to try and minimize metal shards & slivers getting into the cogs.)
It's a little on the sketchy side as it means only one stud goes through a hole, but the other three studs are aligned in such a way that they still help secure it in place once all the other nuts are screwed in.
There's a ridge in the middle of the CP housing at the bottom, but there is still enough clearance room to fit nicely.
375be1e8-2573-44b5-b461-e53986f6674a.jpg

Next up, an alberto repro 2P panel that had standard Taito layout studs. Started on the 2P side and it fitted nicely.
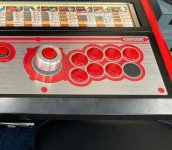
1f165c09-d5b9-488c-ab4f-f4d7f887d328.jpg

Looking at the 1P side, if the main spinner switch was mounted facing left / to the outside of the cab, there is a higher ridge of structure on the lower CP housing that meant it didn't fit.
Once reversed, so that the switch faced right (see pic below) there was just enough clearance to fit nicely.
I made sure this was taken into account before proceeding with the next step.
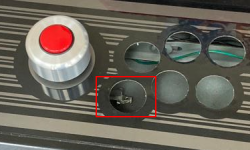
Switch.png

On the 1P side there is an overlap with the CP surround. I couldn't see any way of resolving, so I had to trim a bit of the corner off.
As below, a good part of the moutning hole is still available, so it can still be attached firmly.
053cca26-3be9-4883-9b15-d895defabe81.jpg
31ca0f0f-80ce-419f-a195-5b858772c19e.jpg

Next up, a Raf repro 2P panel had the JLF-P-1 patterned mounting bolts (I also have an alberto with the same studs, plus a shadaloo and one that possibly came from HKLegend).
In order for this to work, 4 x holes had to be drilled.
Note to oneself, all mounts are not the same.
Having taken lots of care measuring previously, I got sloppy.
I used a an official/standard plate, but drilled centrally into the oblong holes. All panels conform, but some studs are max width, and some are min width. That meant I had to do a bit of boring and sawing...
...looks good though, and now means I have a bit of mix 'n' match availability, which is pretty much the only thing I originally had in mind as a way of catering for a couple of different setups without having to change panels. :thumbup:
ea66d639-d338-4ba0-911e-79e16647c8e2.jpg

Update

Panel and spinners fit nicely into a Windy 1 & 2 cab
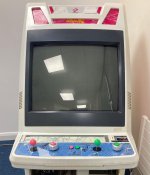
525a77ff-28a8-48e5-9d63-d46fe1d3fcca.jpg

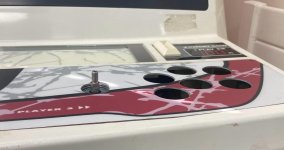
Spinners don't fit if using an original Windy panel, and it has raised mounting brackets.
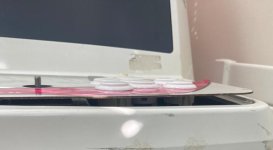
c0be27e6-d614-46b0-ba6b-09d2b3712355.jpg

Repro panels that use flush mounts do fit
8bd5d88b-9fb7-459f-b66a-1ae76c200bb3.jpg71b89bd7-57b1-4124-b7bb-b4422159082a.jpg
 
Last edited:
I got good news and bad news.

Good news: the regular Capcom spinner stickers have arrived.

The bad news: the printers screwed up the scale.

2A3C07D0-9299-4389-8C52-8FA2B0A43098.jpeg

I’m working with them now to get this sorted out. Sorry for the delay, folks. It’s going to be another week till these are ready. I’ll keep ya posted
 
I'm also on the side to ask for a pair, this is also cool for games like "Ultimate Ecology (Which I believe is CPS2)" and uses the exact same spinner afaik
Also, I don't think it should be a hard task to make it work on other consoles/ports, take this for example
View: https://www.youtube.com/watch?v=dSZXUOHtoXg

From what I can gather, it was made with an Arduino, I have 0 experience working with one, but I have a general idea of how it was done tho

So, yeah, 2 for me please
 
man, it's pretty cool to see my old artwork on so many cabs :) I learned to use inkscape while making it, all that time spent was worth it it seems ! makes me want to pop it in one of my cabs right now :D

Great work on those spinner repros !!! happy see this project come to fruition :thumbsup:
 
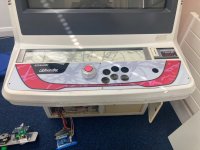
I did a quick and dirty supergun test with the spinners and I'm pleased with the results. I had to remove a metal bracket from the player 2 spinner pcb to fit it inside a Blast City control panel housing. My next steps will be sticks, buttons, and working out wiring solutions for my cabs and supergun.


C01A4D31-AD15-499F-A476-398424A82B14.jpeg
 
Back
Top