What's new

notsonic

Champion
Joined
Oct 23, 2019
Messages
1,020
Reaction score
1,265
Location
NJ
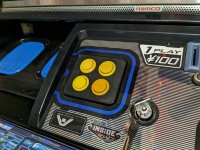
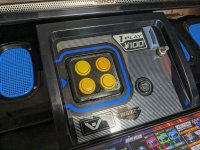
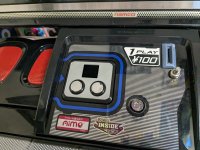
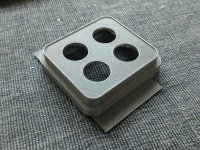
This replaces the entire Banapassport card reader and its bracket with a shell and panel for extra buttons. The panel fits pretty snug inside the shell, but you may want to glue it in place.
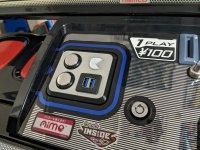
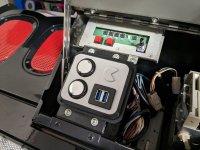
PXL_20230803_230503832.jpg PXL_20230803_230517871.jpg

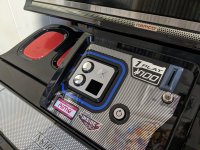
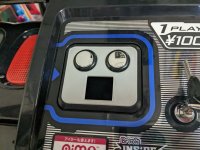
I've got a few different panel options included. 4x24mm buttons, 2x24mm with square USB ports, and 2x24mm with round USB ports. I'm happy to take any suggestions for different panel layouts.

I printed it on a Prusa MK3S+ using PETG and the 0.3mm DRAFT settings.

Here's some of the design iterations I went through for anyone interested. First I started with a single piece and 30mm buttons. Shrank it down to 24. Then when I started adding details there was no good flat surface to print without supports, so I split it into the current 2 piece. Then I added all the details with rounded edges and mounting holes. I also thickened up the panel from 1mm to 3mm since it was pretty flexible with PET.
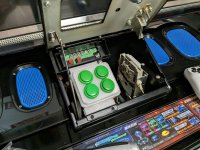
PXL_20230722_004506927.jpg PXL_20230722_205740480.jpg PXL_20230723_000821455.jpg PXL_20230723_000803228.jpg PXL_20230723_184553779.jpg
 

Attachments

  • Noir Banapass Replacement Shell and Panels r2.zip
    53.3 KB · Views: 106
Last edited:
I'm still waiting on parts to come in (different buttons and usb ports) but I've been messing around with the layout and color options.

The frame is still black pet but I found an almost metallic silver pla (https://www.amazon.com/dp/B07QGV6D8P) to try to mimic the metallic overlay. Metallic silver or blue buttons also go pretty well, especially with the black rim. I also tried adding a lil pac man to take up space. I'll update the first post with the STLs when I can confirm the USB port holes.

PXL_20230802_175155208.jpg PXL_20230801_235550664.jpg PXL_20230801_234823534.jpg
 
I updated the first post with a new zip of the panels with USB ports.
 
That's really neat. I might have to toss something similar in my Grigios. The panel looks similar enough.
 
Awesome I was looking to model this my self, but had not got around to it. do you also want to share the step files? :)
 
Nicely done, I had helped out a buddy with the same thing. I can share these here if yall like.
They use 12mm buttons and the same components like the vewlix subpanel.
Oh, you would also need some threaded inserts. It uses the existing screws to mount.
 

Attachments

  • Screenshot_20230809_081007_Messenger.jpg
    Screenshot_20230809_081007_Messenger.jpg
    103.5 KB · Views: 88
  • received_228213769991966.jpeg
    received_228213769991966.jpeg
    190 KB · Views: 88
  • Screenshot_20230809_081451_Gallery.jpg
    Screenshot_20230809_081451_Gallery.jpg
    152.2 KB · Views: 95
  • Screenshot_20230809_081532_Gallery.jpg
    Screenshot_20230809_081532_Gallery.jpg
    67.7 KB · Views: 88
  • Screenshot_20230809_081543_Gallery.jpg
    Screenshot_20230809_081543_Gallery.jpg
    70.7 KB · Views: 93
Nicely done, I had helped out a buddy with the same thing. I can share these here if yall like.
They use 12mm buttons and the same components like the vewlix subpanel.
Oh, you would also need some threaded inserts. It uses the existing screws to mount.
Those look awesome! please do it would be cool to print it and try it out :)
 
I modeled it after the original. Its for the leds to shine through. The sticker is quite thick so you dont notice it.
 
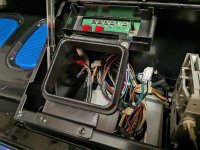
This replaces the entire Banapassport card reader and its bracket with a shell and panel for extra buttons. The panel fits pretty snug inside the shell, but you may want to glue it in place.

PXL_20230803_230503832.jpg PXL_20230803_230517871.jpg

I've got a few different panel options included. 4x24mm buttons, 2x24mm with square USB ports, and 2x24mm with round USB ports. I'm happy to take any suggestions for different panel layouts.

I printed it on a Prusa MK3S+ using PETG and the 0.3mm DRAFT settings.

Here's some of the design iterations I went through for anyone interested. First I started with a single piece and 30mm buttons. Shrank it down to 24. Then when I started adding details there was no good flat surface to print without supports, so I split it into the current 2 piece. Then I added all the details with rounded edges and mounting holes. I also thickened up the panel from 1mm to 3mm since it was pretty flexible with PET.
PXL_20230722_004506927.jpg PXL_20230722_205740480.jpg PXL_20230723_000821455.jpg PXL_20230723_000803228.jpg PXL_20230723_184553779.jpg
This is awesome!
 
Has anyone made one with the split style yet ? I have the card readers on mine for tekken.
 

Attachments

  • 71579459693__37A40168-BA6D-41AF-8FF4-E397D762926E.jpeg
    71579459693__37A40168-BA6D-41AF-8FF4-E397D762926E.jpeg
    135.8 KB · Views: 79
Back
Top