What's new

notsonic

Champion
Joined
Oct 23, 2019
Messages
1,113
Reaction score
1,412
Location
NJ
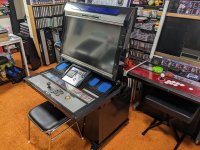
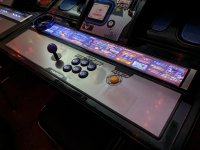
I just got two Namco Noirs. These cabinets are kind of hard to find information about. But luckily, they're pretty easy to take apart.

You'll need a security Torx bit (it's t20something, just get a set), 7mm, 8mm, 10mm sockets, #2 JIS screwdriver (do not use a regular Philips), and a flathead screwdriver. I used an impact driver on all the 10mm and security screws so it went way faster than if you do this all by hand. I would not recommend power tools on the JIS screws.

Removing the control panel
Open up the control panel by unlocking the top door and sliding the control panel lever thing to the right. Disconnect the connections for controls and the led lights.
Undo the two screws on each side, on the inside, that hold on the plastic trim.
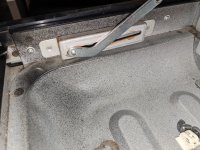
PXL_20230714_231444088.jpg

Remove the two security screws on the outside. The trim will come off with some force, there's clips on top. Do this on both sides.
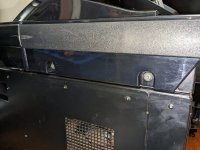
PXL_20230714_230449476.jpg

Undo the two 10mm bolts on both sides.
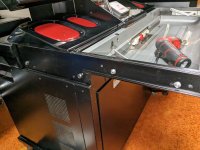
PXL_20230714_231028425.jpg

Undo the two 10mm bolts underneath the panel.
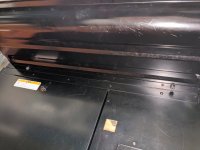
PXL_20230714_230042361.jpg

The control panel can now slide out and away from the cabinet.
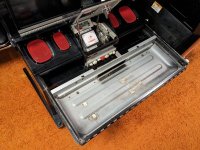
PXL_20230714_225809799.jpg

Disassembling the control panel housing
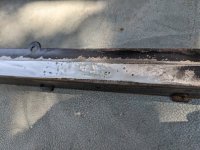
Noirs are notorious for rusting at the wrist area. If you want to properly clean it up, you'll need to remove the top housing from the panel assembly. I ended up sanding mine down with an angle grinder and getting them powder coated.

Remove the actual control panel. There's 6 7mm nuts holding it.
Remove the 6 screws that hold the front plastic trim.
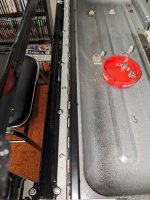
PXL_20230715_003332635.jpg

Remove the C clips from the side hinges but don't disconnect them yet.
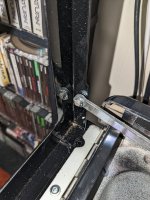
PXL_20230715_002738341.jpg

Remove the 5 screws that hold the top housing to the hinge.
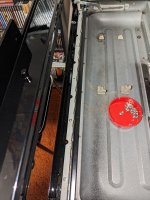
PXL_20230715_002755593.jpg

Now just slide the side hinges off the posts. There's a washer on either side.
 
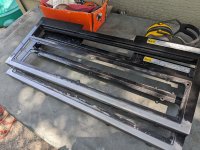
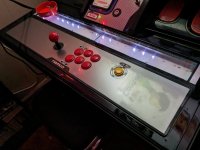
Here's some before/during/after of the control panel housings. I also put electrical tape along the bottom edge of the panel to try to smooth out the lifting overlay. It's ok but I want to find new overlays eventually. I also should have used a finer grit flap disc when grinding them down. The grinding marks ended up showing through the powder coat.

PXL_20230713_032256720.jpg PXL_20230713_165716738.jpg PXL_20230713_173134838 (1).jpg PXL_20230715_015314888.jpg PXL_20230715_015310127.jpg
 
Removing the marquee
The marquee is held by these 4 security screws. Lift up to remove. (Marquee is not actually pictured here.)
PXL_20230714_224925565.jpg


Removing the monitor
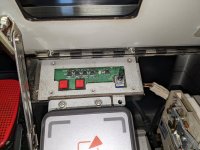
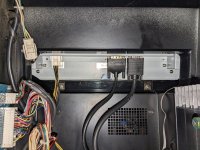
The monitor is pretty easy to remove. Start by removing the remote board and disconnecting the two connections on it.
PXL_20230714_225257679.jpg

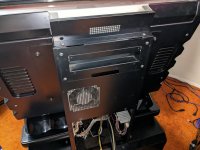
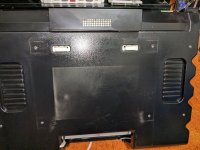
Open up the back panel.
PXL_20230714_225524358.jpg

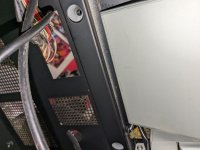
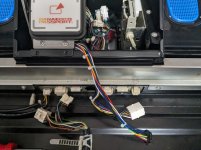
Disconnect the wiring for the top light, monitor power, and video cables. Also pull the remote board wiring through so it's free.
PXL_20230714_225114189.jpg

Undo the 4 10mm bolts (2 on either side) and 2 security screws on top.
PXL_20230714_224925565.jpg

The monitor lifts up and away.
PXL_20230714_224138679.jpg
 
Removing the top half
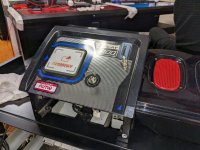
Start by removing the banana passport reader by undoing the 4 screws and disconnecting the harness.
PXL_20230714_223455041.jpg

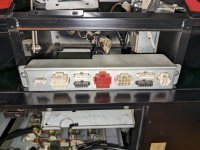
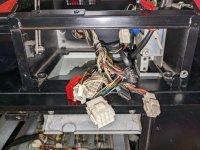
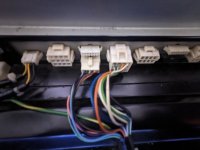
Remove the front wiring panel and remove all the connectors from it.
PXL_20230714_223459643.jpg

Undo the wiring from the wire retainers.
PXL_20230714_222851887.jpg

Disconnect the coin switch
PXL_20230714_222739707.jpg

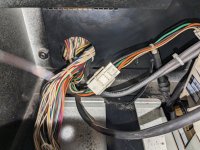
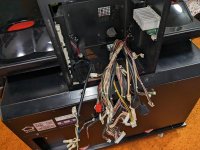
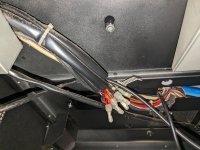
Go around back and go to town disconnecting everything. Disconnect the fan, left and right speaker, JVS IO, and sound amp. Pull the front wiring harness through the hole. The only possible connector you can mix up is the right speaker and fan if you have a 12v fan. The right speaker should be purple and blue wires, and longer than the fan's. The cabinet in the pics has a 120v fan (and fluorescent top light) which just uses quick disconnects. My other cabinet had a 12v fan and LED top lights.
PXL_20230714_221527792.jpg

The top part is held on with 10 bolts. 6 around the perimeter and 4 inside holding it to the service door box thing.
PXL_20230714_221333640.jpg
 
At this point you can probably move the cabinet with some assistance. If you're like me and want to move it yourself, keep disassembling.

Remove the transformer
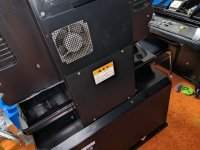
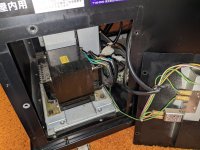
This thing weighs a ton. First, remove the rear power panel. Undo the two connectors and remove the two screws. Slide it out. Reattach the rear power panel with a few screws if you're going to move the cab.
PXL_20230714_214512554.jpg


Remove the insides
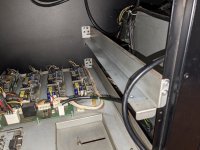
This is pretty straightforward. Remove the two wingbolts holding the pcb mounting board. Then remove the right rail to get more access later. It's two screws in the front and two 7mm nuts in the back.
PXL_20230714_220859417.jpg

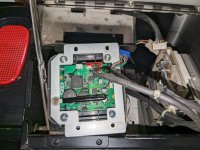
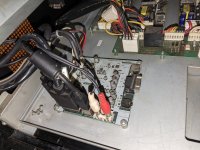
Disconnect the cabinet link board.
PXL_20230714_220653260.jpg

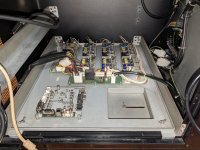
Disconnect the power supply connections and undo the two wing bolts holding the mounting plate in.
PXL_20230714_220528822.jpg

Remove the speaker boxes
The speakers are held in with 3 screws each in slotted holes. Just loosen the screws and slide the speakers off. The right speaker might be easier to access from the rear.
PXL_20230714_215430447.jpg PXL_20230714_213952998.jpg PXL_20230714_215415361.jpg

Remove the top service door box thing
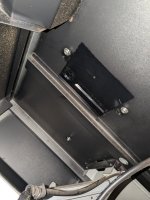
This is held in with 4 bolts. They can be accessed from underneath. We removed the pcb mounting rail earlier to make this easier.
PXL_20230714_215013001.jpg

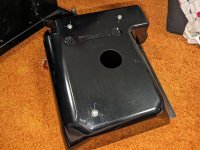
The two rear bolts are inside some holes. The two front bolts are obscured a bit by the coin chute and that tray thing.
PXL_20230714_214958672.jpg

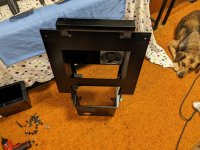
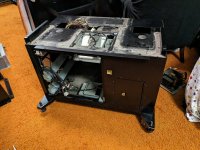
You should be left with this which is easy enough to move for one person.
PXL_20230714_212936595.jpg
 
Assembly is the reverse of disassembly. (I actually took the pictures as I was reassembling it. Movie magic.)

PXL_20230715_015303974.jpg

Please don't hesitate to ask questions or for more pictures of anything. Control panel rust aside, these cabinets are pretty nice, I'm not sure why they're not more popular in the home.
 
This is invaluable info. I've seen something similar from a gentleman named Jon Paul (who may or may not frequent the forum) but this was a comprehensive breakdown. You will save a new Noir owners hours with this. Cheers.
 
PXL_20230715_015303974.jpg

Please don't hesitate to ask questions or for more pictures of anything. Control panel rust aside, these cabinets are pretty nice, I'm not sure why they're not more popular in the home.

I got a pair of these and run different systems in em. They don’t link up without the old IOs tho.
 
This is amazing information. Thank you for all the hard work you put into this.
 
Great write up & pictures there is less about this cab than say the generic Vewlix written.

It was always a toss up between this & the Lindy for me but the latter just swings due to some aesthetic design but maybe one day I could own both.

Either way it would be without the marquee holder.
 
Nice thanks. I plan on sticking with the monitors they came with for now (especially after spending on upgrading the two in my Vewlixes.) I'm not sure the model number but they're 1080p Wei-Yas. They're in surprisingly good shape. Not like the tanning beds in my Vewlixes.
 
Oh yeah, I wouldn't have done mine if they were the 1080p monitors already.

It's a very ghetto way of doing the upgrade for me, but the monitor is soooo much nicer.

Which do you prefer vewlix or noir? Noirs are built like tanks and they also sound great.
 
Monitor upgrades are so much more accepted on lcd cabs like it has to be done.

I guess its when these cabs came out lcd tech was rapidly evolving & pre 2010 screens are well past it now & have high power consumption, my Lindy had the upgrade prior to me getting it to a nice LG unit.
 
The biggest loss with a modern screen is you can't really get a 720p native panel anymore, and scaling doesn't look that good. I don't know if any of the original monitors are actually 720p either, most are 1360/6x768. I'm holding out hope for the new retrotink which may do digital 720p to 1440p.

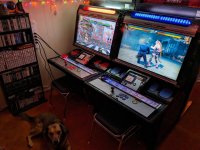
Some pros/cons I've thought about having a Vewlix and Noir now in the same room:
Noir control panel is at the shorter "normal" height, but the monitor is as high as a Vewlix's. I prefer the ergonomics of the Noir.
Noir weighs like twice as much. It has a lot less parts and feels more robust.
Noir cabinet linking is so much nicer with the little trap door at the bottom instead of the hole in the back on the Vewlixes.
Noir has no holes to run cables from the control panel area into the cabinet. I had to remove the 2p connectors for additional wiring.
Vewlix IO options are much more readily available. JVS, Fast, even Jamma, and community alternatives.
Vewlix monitor, speakers, etc are really annoying to service. There's also a lot of adjustment and wiggle room to line all that stuff up.
You can rotate the monitor in a Vewlix which is a plus, but there's so little 16:9 software it's not that big of a deal.
Vewlix control panel is much nicer. The angle at the edge is more comfortable. Noir's is less deep, squared off, and has the stupid trim on it.

Overall they both have pros and cons. I think most people will gravitate towards the Vewlix because of the wealth of information and community support, and they look nicer. Noirs and Lindberghs are very overlooked though.
 
Another great write up.

I prefer overlooked products in general, I drive a Lexus GS4 also made in Japan.
 
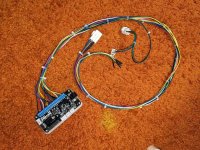
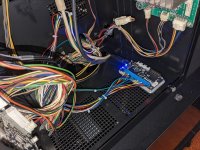
I wired up some UFBs. I just popped the P2 connectors out and put in new ones wired to the brook harness. (I probably should have just made it plug inline with the P1 connectors instead, but I didn't feel like doing that many more crimps.) I wired Home to coin which I did make as an inline connection though. The stick and start are JST-SM connectors (I used these knockoffs from amazon https://www.amazon.com/dp/B07CTKD7P4) and the buttons are JST YL connectors. I'm debating making a replacement panel to go where the banana reader goes to add extra buttons, but I'm not sure if it's really necessary yet.

PXL_20230716_191910293.jpg PXL_20230717_181740025.jpg PXL_20230717_182942672.jpg PXL_20230716_174341680.jpg

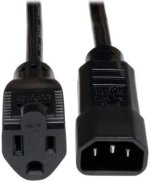
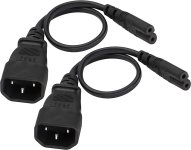
I also found these different C14 power cable adapters to deal with the Noir not having an outlet inside to plug in the PS4s.
https://www.amazon.com/dp/B00FBA1U7G
41Qydx472yL._AC_.jpg

https://www.amazon.com/gp/product/B082R4WXB8
71e7jg+ZyvL._AC_SL1500_.jpg
 
I made up a similar setup with a Pi Zero board, handy to plug the cp into without modding any oem wiring.

But I just went with a JVS-PAC 2 in the end but it was nice to keep my options open.

I also added some sockets on a kettle plug extension board.

I need to stop looking at this thread as its making me lust over a Noir.
 

Attachments

  • DSC_1077.JPG
    DSC_1077.JPG
    217.5 KB · Views: 89
  • DSC_1219.JPG
    DSC_1219.JPG
    149.3 KB · Views: 81
Last edited:
Is the link board needed or can it bypassed as it looks like the sound phono comes out of it

Also it possible to just use the JVS direct from the I/O?
 
Back
Top